Tuesday, March 31, 2015

Project #6 - Embossed Notecards

I attempted embossing years ago and just couldn't get it to work.  If you have ever seen the embossing powder you know how easy it is to just make a complete mess!  Fine silver powder everywhere was not what I wanted.  I traded the blow dryer and lightbulb for the iron this time, keeping the iron on a very low setting and running the underside of notecard along the edge of the upright iron. This worked magnificently!  It did not blow the powder all over like the blow dryer, or cook the paper like the lightbulb did.  Patience is still key, though you have to work quickly so the ink doesn't dry before you sprinkle the embossing powder on.  A bit of a juggling act.  I would not recommend doing  this with small children around though, it could end up in a huge mess.   I fell in love with this stamp years ago and was very happy to use it again!  I think this would be gorgeous in the girls room with the other vintage fashion decor, stamped with silver paint as a boarder....!  


Monday, March 30, 2015

Project #5 - Mini wallet/gift card holder

Gift cards are about the most awesome thing to a kid now - Starbucks, Target, iTunes...it's the magic gold card that entitles you to buy that thing that your mother won't buy for you - the 'But it's my OWN money' card....  let's be honest, don't we all love giftcards? I hate the space they take up in my regular wallet though.  Perhaps that's why I love my Starbucks app so much... We had a trip to the library planned today and as I made a mental note to make sure I had all the library cards, I thought how great it would be if each of the kids had their own card holder.  Maybe teach a little responsibility, lessen the wad of cards I have to keep track of, it's a win-win! 

The Mini-wallet was incredibly fun to put together - I spent more time picking out the fabrics to use than actually sewing it!  For being so small, it used up a surprisingly good amount of fabric.  With the largest piece of fabric being 4.5x6, I was able to use pieces that really weren't big enough for anything else.  It used a very small amount of fusible interfacing and of course the two KAM snaps, both of which I had on hand, so no money spent out of pocket yet!  I have been seeing a lot of actual patterns for sale for making similar wallets, but honestly I don't think they are necessary.  I ended up making two sizes, one card-sized one for the kids and a slightly larger one for just about anything you can think of.  I will use mine for holding teabags and Via packs in my handbag so they will no longer get crushed amid the 26 lipglosses I accumulate I my bag.   The mini-wallet is a cool 3in x 4in.  The midi-wallet is 4.5in x 4in.  Love them both, I am thinking a cute little wrist strap could be a great addition to either one...

The Eiffle Tower Midi-Wallet


Want a tutorial? Let me know if the comments and I will see what I can do! 

Sunday, March 29, 2015

Project #4 - Oh-so-simple wrap bracelet

Busy days call for quick projects, but I did manage to squeak this one in!   In perusing simple projects online, I kept coming across this simple wrap bracelet.  So.  Simple.  Seriously.  There isn't even a pattern, well, I guess there is somewhere, but certainly not one you need to be going by to make this versatile little beauty.  I used the light cotton yarn that has a bit of sheen to it, it's a really pretty sapphire color that didn't photograph as well as it looks in person!   Very lightweight, perfect for spring/summer...if it ever gets warm again here.  *sigh*

Super easy.  Start with your choice of yarn or string, the chain a good 160cm or so, then turn and skip one chain and add three single crochet into the next stitch.  Continue to slip stitch in each bottom loop all the way back to the beginning.  Once you get to the beginning, chain a few stitches to allow for a loop to fasten to your desired button.  Tie off the loop, weave in the ends, and sew the little button onto the end where you made the 3 single crochets.  That's it.  You have an awesome wrap bracelet that can even double as a necklace.  Great way to add a little color for summer without spending a fortune!  

Saturday, March 28, 2015

Project #3 - Hello, Fred.

Since the creation of the hedgehog & George the Golfish, it was only fitting to give them a friend.  I pulled out the green yarn and put it on the table...what creature could we make with green?  I thought turtle but was vetoed by the kids.  A dinosaur was the consensus.

Meet Fred.


Look at that face, how can you resist?


George the the Goldfish is is embracing his new Dinosaur friend.  

Friday, March 27, 2015

Project #2 - The Coffee Collar

It goes by many names, coffee collar, java jacket, coffee-cup-holder, thing-that-keeps-my-hand-from-burning, but whatever you wish to call it, it can not be disputed that it's necessary for anyone who's steaming hot cup is a permanent extension of their constantly-in-motion body.  (Let's be honest, most caffeine addicts are usually a tad busy and distractible... Look! A squirrel!)  It may seem simple, but the plight of the hot cup is a real one.  I'm a Starbucks lover and in all honesty I have never been given a cup through the drive through there without a collar, but alas, the nearest drive-through Starbucks is 10 minutes out of my way - and certainly not on my way to the hockey rink!  I must settle for Tim Horton's, which is also good (dark roast anyone?), but my store is hit or miss on providing the collar which presented quite the problem this season when I was running late for a game and having gone through the drive-through because like every hockey-mom, I needed my coffee for the 7:30am game (read: getting to the rink by 6:30am).  I realized too late I had no collar and thus played a literal game of hot potato with my coffee cup.  Cue the stash-packed coffee collars.  Had I possessed one of these simple beauties in my car or bag, My hands would have had a much better morning.

The Coffee Collar is available here!


Today's project was simple, under an hour easily.  If you are not constantly interrupted by children asking for food during the process, 30 min!  It was a good stash buster and since I even had a collar on-hand, I didn't even need to print out a pattern.  Extra points for saving paper & ink!  The fabric was being hoarded for a tote bag (which you may still see..) and I had fusible stabilizer.  The stabilizer was a nice thin, low-profile with iron-activated adhesive on one side.  I opened the collar I was using as a template and cut around the stabilizer to the exact size of the collar.  I then laid it on the fabric and cut out around the shape, leaving room around the edges.  I did make two at the same time, in reversed colors, so don't be confused with the doubles in the pics.  Because I am anal-retentive about certain things, I marked the fold lined onto the stabilizer and placed the stabilizer adhesive side down onto the wrong side of the inner fabric, then ironed to fuse.  Follow me?  As an added bonus, the adhesive added a touch of texture to the inner fabric feel which I really liked.  Sort of adds a little extra grip to the inside to grip the cup.   I then sewed along the fold lines of the stabilizer/inside fabric.  Next, place the right sides of both fabrics together and sew right along the edge of the stabilizer, starting from the narrow, notch edge and finishing all the way around, stopping to leave the notch side open for turning.  Trim around the edge, leaving a small allowance.  If you want to be fancy use pinking sheers like I did.  Its just more fun with pinking sheers.  Turn the color right sides out and be sure to poke out the corners neatly.  Press it nicely and sew the notch end closed, turning the fabric ends inward, with a blind stitch.  I prefer to do this part by hand, you could certainly do it on the machine, but it would give you a thicker profile to the edge and the chance for uneven visible stitches.  Once the end is closed, press again and press the side folds well.  Lay it flat, see where the two ends overlap making sure the notch edge in on the inside, and pin in place.  Continue sewing around the edge overlap with a blind stitch to secure it together.  Again, you could sew the ends overlapped on the machine, but I like the clean, low profile of hand sewing it.  It avoids visible non-symmetrical stitches and honestly is quick to do, I would spend more time arraigning perfect stitches on the machine.


There you have it.  A stash-worthy coffee collar, perfect for keeping in your car, office, or bag fro that moment you need a collar...or jut to pretty up the cup you have!  Isn't it gorgeous?!


See the low-profile on the overlap?  I am not a fan of bulky seams and I like things to function well without annoying baubles and excess fluff because when it comes to my coffee, it's no time for games.  ") 


Set of two, so you never are without.


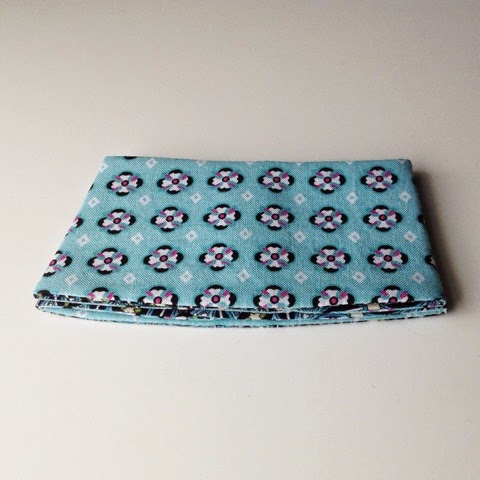
The low-profile makes it perfect for hiding in the pocket of even your cutest little clutches.

Thursday, March 26, 2015

Project #1 - A goldfish named George

Orange is not my favorite color.  I have a skein of orange yarn and a cut of organic bamboo velour (aka OBV for those who are not privy to the lingo of natural fiber sewing) which I avoid like the plague.  I tend to cover them up and pretend they are not sitting on my workspace counter as a constant reminder of the custom orders they were purchased for, yet the remainders lie in wait...  They would surely be waiting forever as when I look for inspiration for a new project, I just don't grab the caution orange.

As I held the skein of yarn in my hand and my kids stared at it, wondering what such a color could be made into, inspiration struck.  It's Goldfish orange!  Surely this blinding orange yarn would be lovely as a color-appropriate goldfish.  It was a simply pattern really, I jotted it down as I went along & took about an hour of active time - though if I wasn't pattern writing as I made it, it would go much quicker!  Wouldn't it be great if I actually wrote out the full pattern?  Perhaps...  

Anyhow, George is beautiful!  I'm not sure what I like the most, the crochet stitches on the body of the ring that looks like scales, the little smile, or the ridiculously adorable fantail!  The orange color fits perfectly and the yarn has a smooth texture which shines just a touch....a bit like a real goldfish does. ")   George might be hard to let go of, he's that cute, but I can not find even a remotely plausible excuse to keep a teether toy in my home. *sigh*

George is currently hanging out in this pond, go catch him before he swims away!


Seriously, fantail cuteness!!

And the fin?! LOVE


George is listed here: *sniff* *sniff*  https://www.etsy.com/listing/227670500/george-the-goldfish-crochet-wood-ring

Wednesday, March 25, 2015

This is the älskar blog project.  It could easily be entitled "Confessions of a Craft Hoarder", but there is a stigma with the word hoarder...and let's be honest, no one really wants to admit they are hoarding fabric, notions, & other treasures.   

Last month it was decided that my daughter needed a flag and not just any flag, a flag that was worthy of waving to cheer her on in her hockey tournament.  We took a quick trip to the fabric store for the flag fabric and some sticky letters and after returning home I started rummaging around in my stash and much to my daughters delight, it was over flowing with more than enough additional supplies to make a tournament-worthy flag, fit for a pink-hockey-glove-wearing defenseman.   The flag was awesome, she scored three goals, and her team won the tournament.  The flag now hangs in her bedroom, alongside her medals.  Score one for Having. Every. Supply. Imaginable.   I am now hiding in shame...

Totes full of supplies, beautiful fabric that was put aside mid-project - and even worse, beautiful fabric just hoarded because it is beautiful.  None of it fulfilling it's project destiny.  It's sad, really.

Even though it is still a bazillion degrees below zero here, I have the most beautiful potted hyacinth in bloom that is telling me spring has GOT to be comings soon and nothing makes you feel more alive than spring.  The need to renew and refresh, to make the living space neat and tidy - though with kids it never stays that way long!

So the project begins!  30 days to create 30 projects, using materials I alrady have.  I am a realist though and realize there may be a few supplies I may need to finish up an item so I am giving myself a $30 budget.  That happens to be the amount of cash I have on hand so I will work in actual cash money...do you remember the last time you actually used CASH??  I may even put it in an envelope and go all old-school...   My aim is to post each item to the etsy store so it will be up for sale.  I have a few ideas but a lot of this will be a fly-by-the-seat-of-my-pants kinda thing...because that's always fun!

So what is your job?  Check back daily, share the älskar blog project with your friends and family on Facebook, pin it, tweet it, etc!  Nothing is more motivating than pressure. ")

Let the creating begin!

~Becki~